|
|
Post by memoryman on Sept 20, 2013 15:53:50 GMT
The light is once again burning brightly at the end of the tunnel. The milky white blemish is what is called an 'anime blush' and comes about by the epoxy reacting with the moisture in the air or, in my case, the rain. It goes when the epoxy is rubbed down. You keep rubbing until you have a flat grey surface. There are no signs of the wood or the 'stripey grain'. All a bit worrying! Then you take a can of varnish and a brush and, with each brush stroke, the grain magically appears. Oh the wonders of this modern age. Did Noah have anime blush? Back to the topic. The intention is to work around the boat and as each section is completed, epoxy, rub down and add two coats of varnish. When it's completed then a complete rub down and another 5 or 6 coats of varnish depending on the finish. I have the bits and bobs for the kicker, downhaul, outhaul, and traveller control. I have yet to get a mainsheet. There is no particular rush, as when the decks are on, I need to turn her over and do the hull. 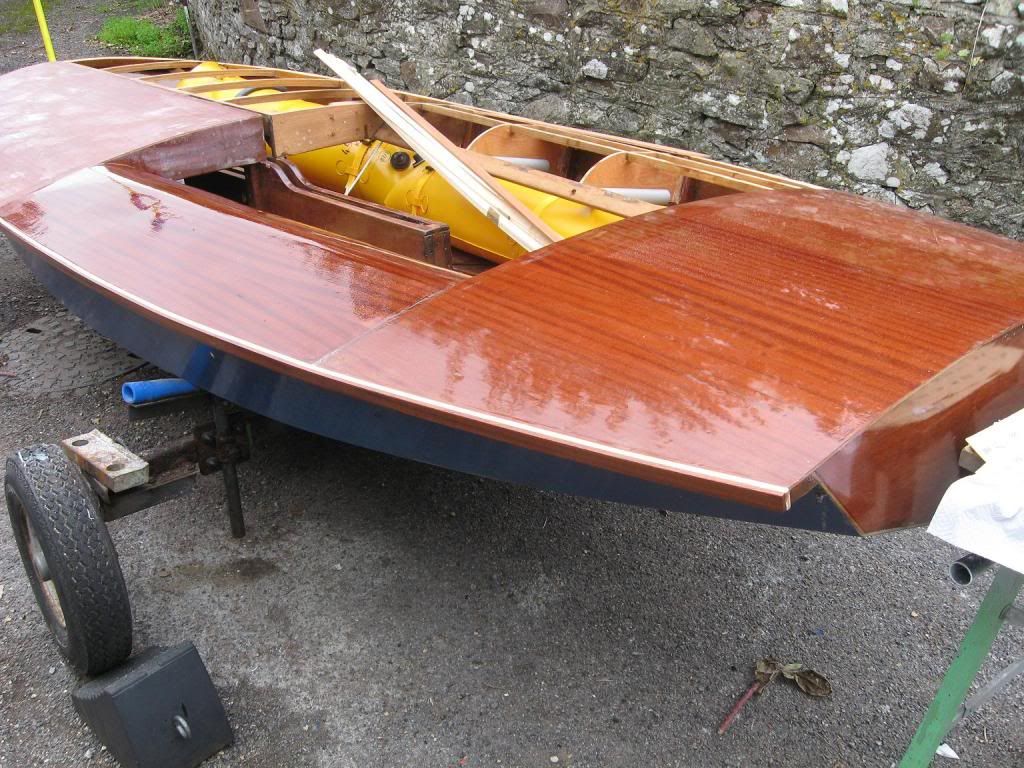 |
|
|
|
Post by memoryman on Sept 23, 2013 16:50:51 GMT
The weather is good and it's nice to be able to work outside. The 'blush' has been sanded from the front deck and a couple of coats of varnish applied. The 'blush' is still visable on the centre thwart - add it to the list of jobs! The sycamore is beautiful wood to work with. It bent around the bow of the boat with no soaking or steaming. It's so pliable. I have cut out and attached the two sapele supports for the traveller on the transom. The actual traveller had a nut and bolt on either side of it to stop it travelling and it looked as if it had always been that way. I seem to remember we all had travellers that did - so to speak, the theory being that one didn't want to sheet the main in tight to the centre line of the boat but to a few degrees off. This theory may well have died a death! Just as a note, I took care in gluing wood dowel into the screw holes in the transom from the previous supports and also placed the scews in a slightly different position so they missed the original holes. I seem to remember someone writing to the forum regarding a transom traveller coming loose. I also filled the holes in the centre thwart as can be seen from the photo. Only trouble is although the wood I used was from scrap that I took from the old decks, it sticks out like a sore thumb! I'm looking for some dye that I can apply to get a decent match. Anyone any ideas? 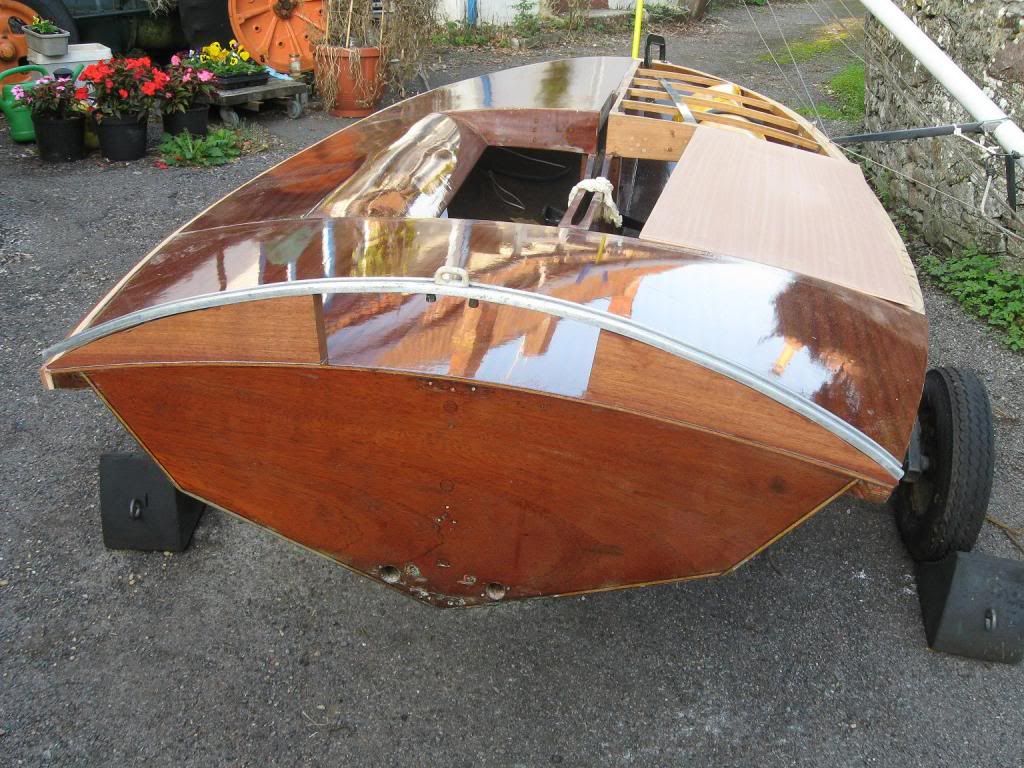 |
|
|
|
Post by colin on Sept 23, 2013 18:15:04 GMT
FYI
What is amine blush?
When using a solvent free epoxy resin such as Interlux Epiglass® Epoxy Resin HT9000, there are some factors you should consider before overcoating with a primer. After application and during the curing (drying) process, the epoxy releases a blush to the surface called ‘Amine Blush’. This blush is known to appear as a ‘wax-like’ film that sits on the surface of the cured epoxy resin. This amine blush will in fact keep some subsequent products applied from fully curing, performing correctly and also yellowing unless removed properly. The visibility of the blush will be determined by the moisture in the air during the curing process, however will still be on the surface if not always visible. The best way to reduce blushing is to work in warm temperatures (the epoxy sets up fast, reducing the blush window) and with humidity at low levels. It would be best to avoid conditions where moisture is coming out of the air as temperatures fall.
How to remove it?
Interlux recommends thoroughly washing the cured epoxy with clean warm water, all-purpose soap, and a stiff brush or Scotch-Brite™ pad. The amine blush is water soluble therefore the only way to completely remove this is by following the instructions above. You will want to clean the amine blush off of the epoxy before sanding as well. If you begin to sand before removing the amine blush, you may sand the blush deeper into the surface making it much harder to remove. It is a safe practice to clean all types of epoxy resin, even if the label states that it is ‘amine blush free’ or ‘no blush formula’. Please note: Aggressive solvents like Acetone will not remove the blush.
|
|
|
|
Post by memoryman on Sept 24, 2013 5:33:22 GMT
Thanks Colin. It hadn't clicked that this bloom was there even if you can't see it. The fact that it turns white when it reacts with moisture is really immaterial, it still has to be removed before the application of another coat. I remember reading somewhere that a good way to prepare the surface is to use wet-n-dry with plenty of soap and water. This seems to work for me. The whole surface needs to be covered in a layer of soapy water - any area that hasn't been 'wetted' needs to be treated with soap and water again. I will certainly try washing the surface with warm water and soap the next time I have to use the epoxy. I assume this is also the reason they suggest three coats applied before the previous one goes off. This doesn't give the epoxy a chance to form the bloom and each coat will chemically bond with the other.
|
|
|
|
Post by memoryman on Sept 24, 2013 10:42:19 GMT
I wrote to Wessex Resins regarding the bloom and have just received their reply. It was the first time I had used epoxy and had fears about the epoxy 'going off' before I had completed the job, especially the rolled side deck. Because of this I decided to use the slow hardener. I'd epoxied the side and front deck late in the afternoon and had then left it to go off overnight. I had the following reply from Wessex
'It sounds like the epoxy coating had not reached a full cure. It may have been touch dry ie. not tacky but perhaps you could have indented it with your finger nail. We have had a dip in temperature recently and when using 206 hardener you need to be aware that it requires 16°C to be sustained for 12 hours before it has fully cured. For this reason most users in the UK tend to use 205 fast hardener as it will cure down to 5°C.'
I remember it had been a cold night and this would explain why the epoxy had not gone off properly and, when it rained the next morning, the epoxy took on the bloom that it did.
I must admit to being a newcomer to this type of project and took on this thread with the idea of others benefiting from my exploits be they smart or not so smart - my exploits not the others! All advice is welcome and will also help others who may read this in the future.
|
|
|
|
Post by memoryman on Sept 29, 2013 7:07:38 GMT
It's 7.30 on a Sunday morning and I've just finished checking recent efforts. The second side deck and the major part of the front deck are now all on and secure. I took Wessex Resins advice and used the fast hardener and that made a world of difference. It gave plenty of time to work with the decking. I must admit to panicking and imagining it was going hard whilst I was trying to fit the deck in position but it was fine. It started to go hard about an hour after I had finished. The side deck is the one that requires the most time. I first used brass pins to fix the edge to the recess in the inboard stringer. I'd bought a 46" piece of 40x40 3mm angle iron which I then clamped along this edge to hold it firmly in place. I assume this is the one joint that takes the greatest strain as one bends the ply back over the formers. I also used three breeze blocks as weights on the top of the side deck to hold it onto the formers underneath. With a few pins in the places with the greatest bend and clamps along the edges, all seemed to go well. The front deck is really quite simple. It is simply a matter of laying the board on the formers and marking out the outline and the hole for the rigging plates. As there are no significant bends, it can be clamped down quite easily. It may be 'off topic' but I've joined Baltic Wharf SC in Bristol. Why - well they have a 50% reduction for OAP's and a 50% reduction for half season. They sail all year and also sail on a Wednesday during the day. This involves a cruise along the docks to a pub for lunch and then an informal race back in the afternoon. Apparently, if the weather is bad, they go in the rescue boat! Having retired, this really appealed and sounds a great way to spend a day. Not only that, but they just sent me an email inviting me to their monthly evening meal at a Bristol pub. What more can one ask for? Well, seeing it's still early, I fancy bacon and eggs and then I'll look at fitting the tiny sliver of ply on the side of the front deck and then a general clean-up. Happy days!! 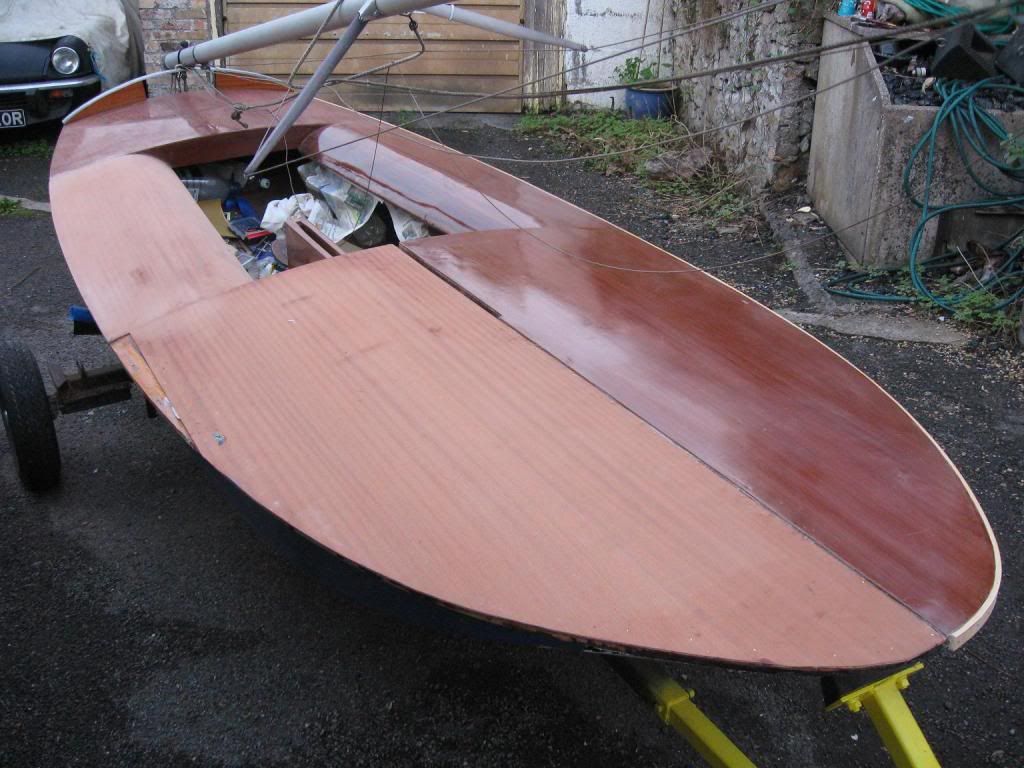 |
|
|
|
Post by memoryman on Oct 4, 2013 13:55:33 GMT
;D I knew it would happen. You start painting and varnishing, the wife comes out to have a look and asks where she's supposed to sit. You say that you only bought it to occupy yourself while she's at her flower arranging classes. She goes inside, throws a few saucepans, drops a couple of plates. You rush in a say you had forgotten to tell her that you'd also bought a two-seater for the both of you. Result - hugs and kisses and a cooked evening meal! Happy days. Of course, I am joking! But I have just bought a Merlin Rocket - a Procter Mk12. Should be OK for the CVRDA and the local club events. Why can't I just grow old gracefully!
|
|
|
|
Post by memoryman on Oct 25, 2013 19:30:37 GMT
Just in in case some friends are wondering where I've been, I thought a quick update was needed. 3 weeks ago I was moving some flower tubs. I picked one up - we all know that only wimps bend their knees! - and felt something in my back move. 3 hours later I was laying on the sofa unable to move. To get around the house I had to roll onto the floor on my hands and knees, unable to stand up. The doctors prescribed pain killers and rest. Three weeks later it is still painful and I dare not lift anything but it is slowly improving. Fairly soon I should be able to continue with 326. I would like to finish her fairly quickly as the Merlin needs some urgent TLC and next summer will soon be here! Here's wishing you all well and take care.
|
|
Simple but brilliant
Guest
|
Post by Simple but brilliant on Oct 26, 2013 7:06:34 GMT
|
|
|
|
Post by rupert on Oct 29, 2013 10:25:27 GMT
Find a good physio, get the exercises that work for your specific problem (the main one for me was lying on my back with knees bent and turning them side to side, without moving my upper back - to begin with I could only move my knees a few inches) and get exercising. Staying still is the worst thing to do.
I've spent months at a time with back pain - absolutely horrible - I wish you well. I've now taken up Yoga, and it appears to be helping.
|
|
|
|
Post by memoryman on Oct 29, 2013 12:38:46 GMT
I must thank the guest who, I'm sure, is certainly not simple but certainly is brilliant(lol). I read the site and went straight to the workshop and found some 4x2 lengths of wood, covered them in a towel and used them as a 'back-block' as per the instructions. The difference was immediate. I substituted the pain killers with the exercises and things have continued to improve. This morning I was able to go out and put a coat of varnish on the decks of 326. All that bending over and no pain - terrific!. Also thank you Rupert - I shall include your exercise in my routine. Other people have also recommended Yoga so I shall investigate further. The CVRDA meeting at Baltic Wharf is approaching and, although I've lost a few weeks, it would still be nice to take 326. The Merlin is already at the club but needs a few jobs doing. I really don't know how I found the time to go to work. Tonight is the clubs monthly pub meal so I can't miss that. Anyway, while the varnish dries on 326 I'll go and cut some new transom flaps for the Merlin.
|
|
|
|
Post by rupert on Oct 29, 2013 20:42:37 GMT
Sadly, I can't make it to Baltic Wharf, but I really hope to see her soon, as she is looking fantastic - a true classic.
|
|
|
|
Post by memoryman on Oct 31, 2013 10:43:39 GMT
Thanks Rupert for your kind remarks. I shall take a few photos of the CVRDA event and either post them here or give a link to my photobook page for those who are interested. Next summer, when 326 and the Merlin are down at Bristol, you'll be most welcome to come and give them a try-out.
|
|


